Wednesday, November 28, 2012


"We need to use light pushes."

Exploring imprinting with a variety of materials by Ms. Sowa

Throughout the past couple of months, we have explored creating different imprints in a variety of materials.  What we have discovered was how the same object could make different imprints.  We also have learned that the appearance of the imprint visually looks the same in different materials, but can feel different.  


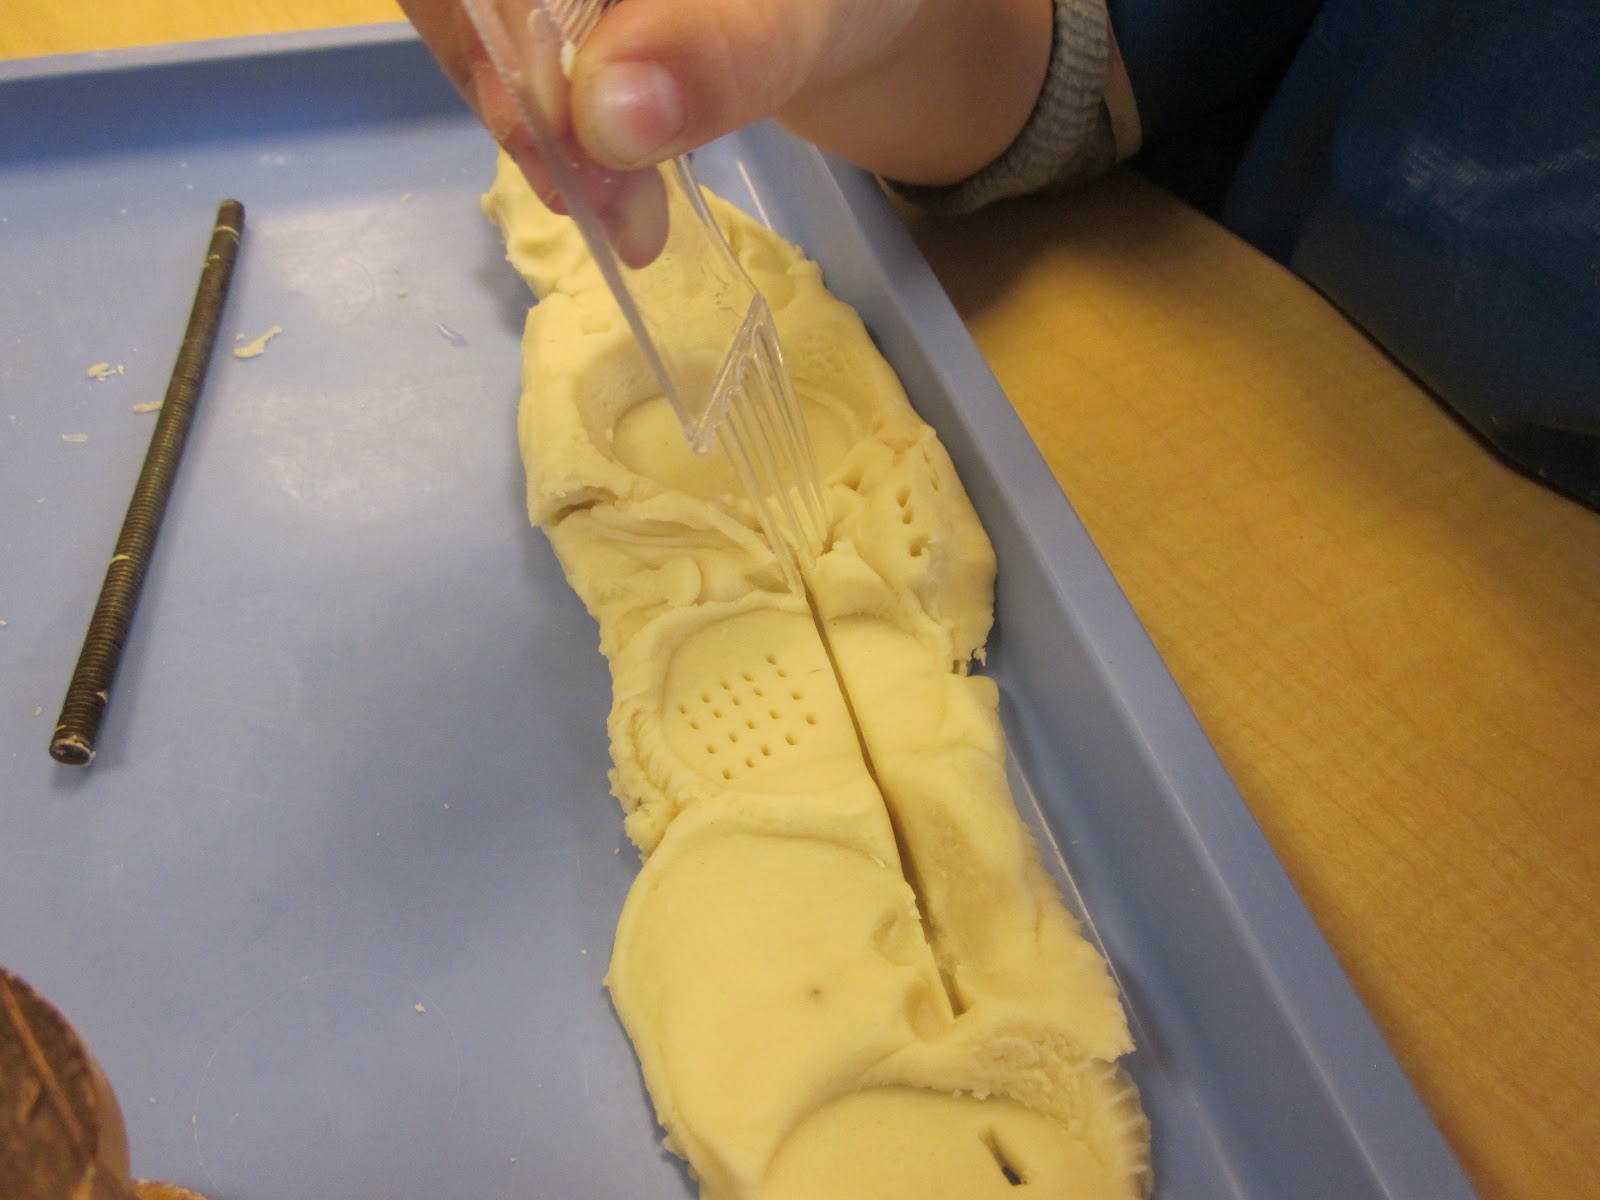
Throughout the semester we explored making imprints in play dough, clay, and cloud dough.  Each of these materials involved using different techniques in order to make an imprint.  To make an imprint in the clay we had to push harder and to make an imprint in the cloud dough we had to use “light pushes.”
 The play dough was our original exploration in September and I brought back the play dough this past Wednesday to see what other things we could learn.  We used the prongs of the comb to poke and to make thin lines.  In our original exploration of the play dough, we spent, much time running the comb prongs back and forth which caused the play dough to look more frayed.   What we discovered was even more ways to create different imprints!

Friday, November 16, 2012


Curriculum Night was a great success!

Thanks to all the families that participated Wednesday night.


 Bubbles in silly putty

The children were very excited to show their families all the different ways to make bubbles in the silly putty. They also came up with new ways to make bubbles. 


 Imprinting

The children showed their parents how to create imprints in the playdough. The parents and the children discovered that each item made multiple imprints.
Kool - Aid Playdough Recipe
1 cup flour
1/4 cup salt
2 TBS cream of tartar
1 pkg Kool aid (generic brands don't work)
1 cup water
1 TBS vegetable oil

In a saucepan, mix all dry ingredients. In a small bowl, mix the water and the kool-aid. (We like to warm the water so the kool-aid dissolves) Stir the mixture over medium heat for three to five minutes until the dough forms a ball in the pan. Knead the dough on a floured surface for one minute. Once the play dough has cooled, it is ready to use! If stored in an air tight container, it should last for several weeks.


 Ramps

The families also explored the ramp with various objects. The children compared objects to discover if they moved faster rolling or sliding. The children also tested two similar objects of different sizes and weights to see which reached the bottom first.


Friday, November 9, 2012

"You got darker brown. I got lighter!"


"I used a lot of colors to make my dark brown!"

An exploration of skin shades

As the children begin to notice similarities and differences among themselves, they have been having lots of conversations about how they look alike or different. We decided to explore this idea as an investigation of skin tones and shades. One of the first activities that we did with the children was to put our hands together and talk about how they looked alike or different. 


 After reading the book The Colors of Us, we decided to try and mix paint to match our skin color. We provided the children with red, white, brown and yellow paint and a container in which to mix their color.

To test their shade of paint, the children put a small dot of paint on the back of their hand.


After the children mixed their skin color, the teachers encouraged them to paint a picture using their newly created color. The teachers talked with the children about how the color could be used to paint a self-portrait. As the children painted painted, many of them mentioned that they wanted different colors for hair and eyes. As a result, we painted again this week using watercolors so the children could add the details that they felt were missing last week.


This week the children painted their self-portraits with watercolor paints. The watercolors gave them the opportunity to add the details that they were previously discussing. We also provided the children with small mirrors so they could accurately represent their facial features.


Notice how Kaia is replicating the blue of her smock on her self-portrait.


Monday, October 29, 2012

Raffle Basket Ideas

 Ms. Muehlenbein and I chose the theme of Animals. Be creative! Think unique! However, here are some ideas for items to include in our class basket for the ECEC basket raffle if you need something to get you started:
  • Non-Fiction books about animals
  • Passes to a great zoo in the area (Toledo, Detroit, Potter Park-in Lansing)
  • Educational games related to animals (dominoes, matching games)
  • Games about different habitats
  • Packages of different types of animals
    • zoo animals
    • jungle animals
    • ocean animals
  • puzzles
  • activities related to endangered animals
 Once you have purchased an item for the basket, please let us know and we will post a list so that other families won't get duplicate items. If you have any questions, please ask either Danielle or myself.

Friday, October 26, 2012

Outdoor Ramps

 "What about the giant hill?" - Investigating ramps outside

 As the children have been gaining more experience using the ramps indoors, they have also noticed there are ramps on our playground.  During this activity the children were encouraged to find and test out ramps they could find outside.  They found ramps in many areas of the playground on the hill, the tree stumps and even on the play structures.

 "No it doesn't roll." 

The children tried using different materials to roll on each of the surfaces they found.  At first some of the materials such as the tape roll didn't seem to work, but when they tried the ball they noticed it worked and rolled down the tree stump.

"What about the giant hill? Maybe that's a ramp?"

The children moved over to the hill next.  They noticed that some of the materials they used to roll down the hill would move slower.  "The tape doesn't go very fast!"  They talked about how some of these materials, even the ball needed to be pushed in order to be able to roll and make it all the way to the bottom of the hill.

"Hey why don't we go to the slide, it look s like a ramp."

 One of the children suggested using the double slide. The child said, "Hey, Let's try this!"  The children climbed to the top of the slide and dropped their materials down.  One of the children used the ball to test how fast it would go down, "Whoa! That goes fast!"  Ms. Tara suggested that the children try to roll the ball up the slide. A child tried this and told Ms. Tara, "It doesn't work, it just rolls back down."

"Let's try the dragon.  Look! Watch! It is!"

 After testing the slide the children found the dragon nearby. "Maybe that dragon thing will work.  It works!"  They tested this to see if it would also act like a ramp, to which they found out it did.


After exploring outside the children noticed there was a difference between rolling the balls on a smooth surface like the slide and dragon compared to the bumpy surface of the grass.  We then decided to focus on using different textures on the ramps to see how the surface of the ramp affects the movement and speed of the ball on its way down.

Thursday, October 18, 2012

"It's a castle tower for people!"

Cooperative building with a variety of classroom materials

The children have been building many structures everyday, since the first day of school. We have been talking a lot about how we respect ideas and what other children build.  With teacher guidance we have been talking about how we can add on to the structures and share our ideas for building. One of the purposes for this long term investigation is to help the children revisit their work over the course of many days.  The children have been asking to save the projects they have invested a lot of time in and work they are proud of.  Along with wanting to save these structures they have been writing their own "save" signs, which is promoting their interest in writing.
 
On Tuesday this week the children began by using two different types of blocks. They first built with the foam blocks and created a basic structure. Jamil and Jenna then began to add the wooden blocks as a road around the tower.

After the children built the road, the stopped to think about what else their structure needed. "We need a pool for the people."  The children built a pool/moat around the outside of the structure near the road.  They even added a diving board.

The children gradually added more materials to the tower, such as seashells, dominoes and light table jewels. Elissa also talked about adding people and animals to the structure.  "We need to put me in the pool!"  "Yeah and I can go on the tower."

This was the final structure the children built. 
We will be continuing to build throughout the semester using a variety of materials. The children have been especially interested in building a hotel out of the legos, which has been saved for a few days now. Come in and see it in the block area or look at the pictures on snapfish.

Thursday, October 11, 2012

"It's Getting Puffy!"


Today we talked about how we could make bubbles using silly putty.  In the beginning of the morning we just used the silly putty without any other objects.  The children have been investigating with the silly putty and talking about how they could make bubbles.  We have been making bubbles with the silly putty by stretching and folding the silly putty many times creating "bubbles" or air pockets in between. 

 At the beginning of the morning the children would hold up the Silly Putty and watch it slowly fall back to the table.  "Pop it!" They would "pop it" by poking a hole in the middle of the stretched out Silly Putty. 

 After just getting more of a feel for the texture and talking about bubbles and "popping it", small plastic cups were introduced to the Silly Putty.

 What can we do with the cup to create a bubble?
The children had many different ideas of how they could use the cup and Silly Putty to make some bubbles. Some children put the Silly Putty into the cup making some interesting sounds.  Some children began stretching it over the cup, waiting and watching to see what happened.

"Now we have to sit and wait and watch it make the bubble."

"Look at the bubble.  See it's right there!"
 "It's getting even bigger!" 
The children found that if they put the Silly Putty over the top of the cup, covering the whole cup and letting it slowly fall to the table, then add little bits of Silly Putty to one side of the top of the cup it would slowly create a big bubble!